updated 20 DEC 2014
-Tim's Battlezone Restore-1
Back Home
Welcome to my Battlezone Restoration Page!
The year was 1980. I was about to graduate high school. The arcade was where everyone gathered on friday night.
There were all the big hits, Pac Man, Ms. Pac Man, Sprint, Space Invaders, Missle Command, Asteroids, and pool tables.
The jukebox played all the music we liked. The snack bar had everything, burgers, fries, shakes and drinks.
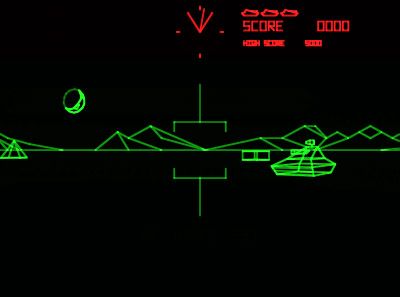
Then there was a new game I saw that was different from the rest. The graphics were sharp. The image was like looking
through a periscope. It moved as if I was inside the machine... in fact, it did put me inside the machine.
It was...
BATTLEZONE
I put in my quarter and pushed the blinking start button. The first time I played the game it hooked me. I scored 1,007,000 on my first game.
I played all night on that one quarter. People gathered around me and cheered me on. I had my name on the all time high score board.
The game engulfed me into it. I seemed to become part of the game. That first game lasted for hours. After it ended, people slapped me on the back.
It was a small bit of fame, respect from the other players, and self satisfaction.
Time travelled on. I went to college and work, my group of friends disbanded, the video game craze passed into history,
and the arcade closed. I never forgot about that high score. I never forgot about the game. 18 years later I had an opportunity to buy a cabaret
Battlezone. It worked, but it was in pretty rough condition. I decided that I would restore it. But again, life had other plans.
Job changes, relationships, and all the other things that come along happened and I ended up putting my game in the shed.
Now it is 2014. Thirty four years after that first game and 16 years after I bought mine. It is time to do the restoration...
Step One: Assess the game.
The cabinet was very deteriorated from moisture and time. The particle board sides were flaking away. The edges were swelled from humidity.
The top was swollen from getting wet. There was rust on the control panel and coin door. Lots of dirt from storage.
The back cabinet came apart when I tried to move it. The cabinet was a lost cause. 34 years will do that to particle board.
Step Two: Does it work?
I plugged it in. The monitor lit up. The Spot Killer was on. The LEDs on the boards were both on. There was a barely audible
hum coming from the speaker. A meter showed the power supply at 5.05 volts with .1 volt AC ripple. That is a good sign.
I pressed the coin switch. Nothing. No life on the board. Time to start fixing.
Step Three: troubleshoot the board.
I began by removing all the guts from the cabinet and put it all on my workbench. I didn't bother with the monitor yet.
* * *Word of advice* * * change ALL of the sockets before any other work, especially the CPU socket. It is a laborius process,
but will save you a lot of time in the long run and make the repair more reliable months from now. If the chip pins are corroded,
clean them with a small brass brush available at most hardware stores. If they break, get a new chip. Don't bother
with trying to repair the pin. The chip is probably bad at that point anyway. There are places available that will make chips for you.
Email me if you can't find anyone to make them for you.
I checked all the wiring. I found some bad connections and repaired them. I cleaned the power supply.
I hooked up the boards, jumpered the test input, and powered it up. I have the print package, and began troubleshooting the board.
The board was in reset. The watchdog was sending resets to the processor. I began repairs by
changing the ROM and CPU sockets. I made a fresh set of ROMS and installed them. Powered up again. Still resetting.
I used an oscilloscope to track down the reset problem. There was a LS244 chip that was bad on the CPU circuit.
Powered up and got some life! It beeped 4 times! So I looked at the book and found 4 tones is a failing RAM at A1.
Inspection found an old scratch on the main board and a trace had corrosion. I cleaned it and repaired the trace and tried again.
At this point it powered up and gave one small beep. A good sign.
I connected my scope to the X and Y outputs but there was nothing coming out of the AVG. I spent several weeks studying the
diagrams, doing net searches, and gaining a respect for the designers of the AVG. I have worked with some innovative electronics,
but the AVG was years ahead of anything else of its time using the same technology. I continued my repair efforts and found
an op amp, a DG201 and a 6012 DAC chip bad in the AVG circuit. I have something on the oscilloscope now. Time for the monitor.
The monitor was removed from the cabinet and put on the bench. I connected it and powered up the system
and the monitor began a vector generated buzz. The image began to come on, but there were heavy lines and badly distorted parts
of objects on the screen. More troubleshooting required.
Continuing on the troubleshooting, I tracked much of the problem to the auxillary board, where I found a bad PROM at F1 and a bad pokey.
Replacing these parts helped, but didn't cure everything. I was 90% at this point, and I finally fixed it with a new interconnect
harness between the boards and reflowing the pins on the boards. I finally had a working boardset. It has been running for 8 months on my bench.
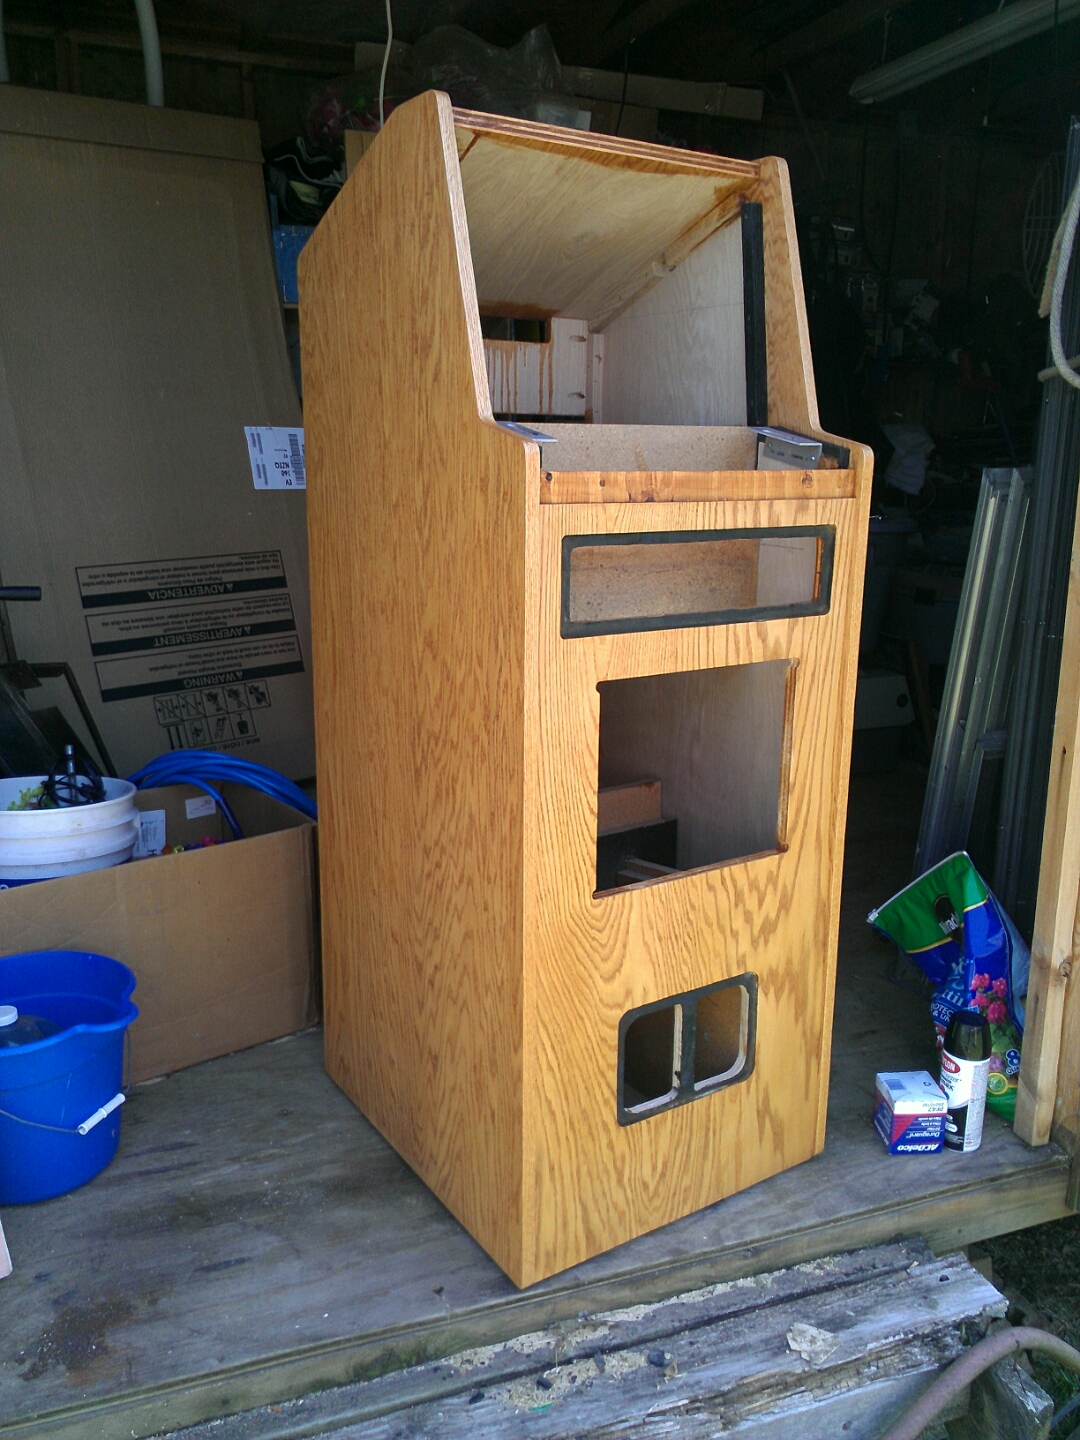
The Cabinet
The old cabinet was literally falling apart. The top was loose on one side. The back parts were sitting on a table in my shop.
I began by removing all the hardware. Coin door off. Top bezel rail off. Marquee off. Speaker grille off. Control panel off.
Clean and paint as needed. The paper bezel was removed. I haven't done anything to it. The side was already coming off, so I finished taking it apart.
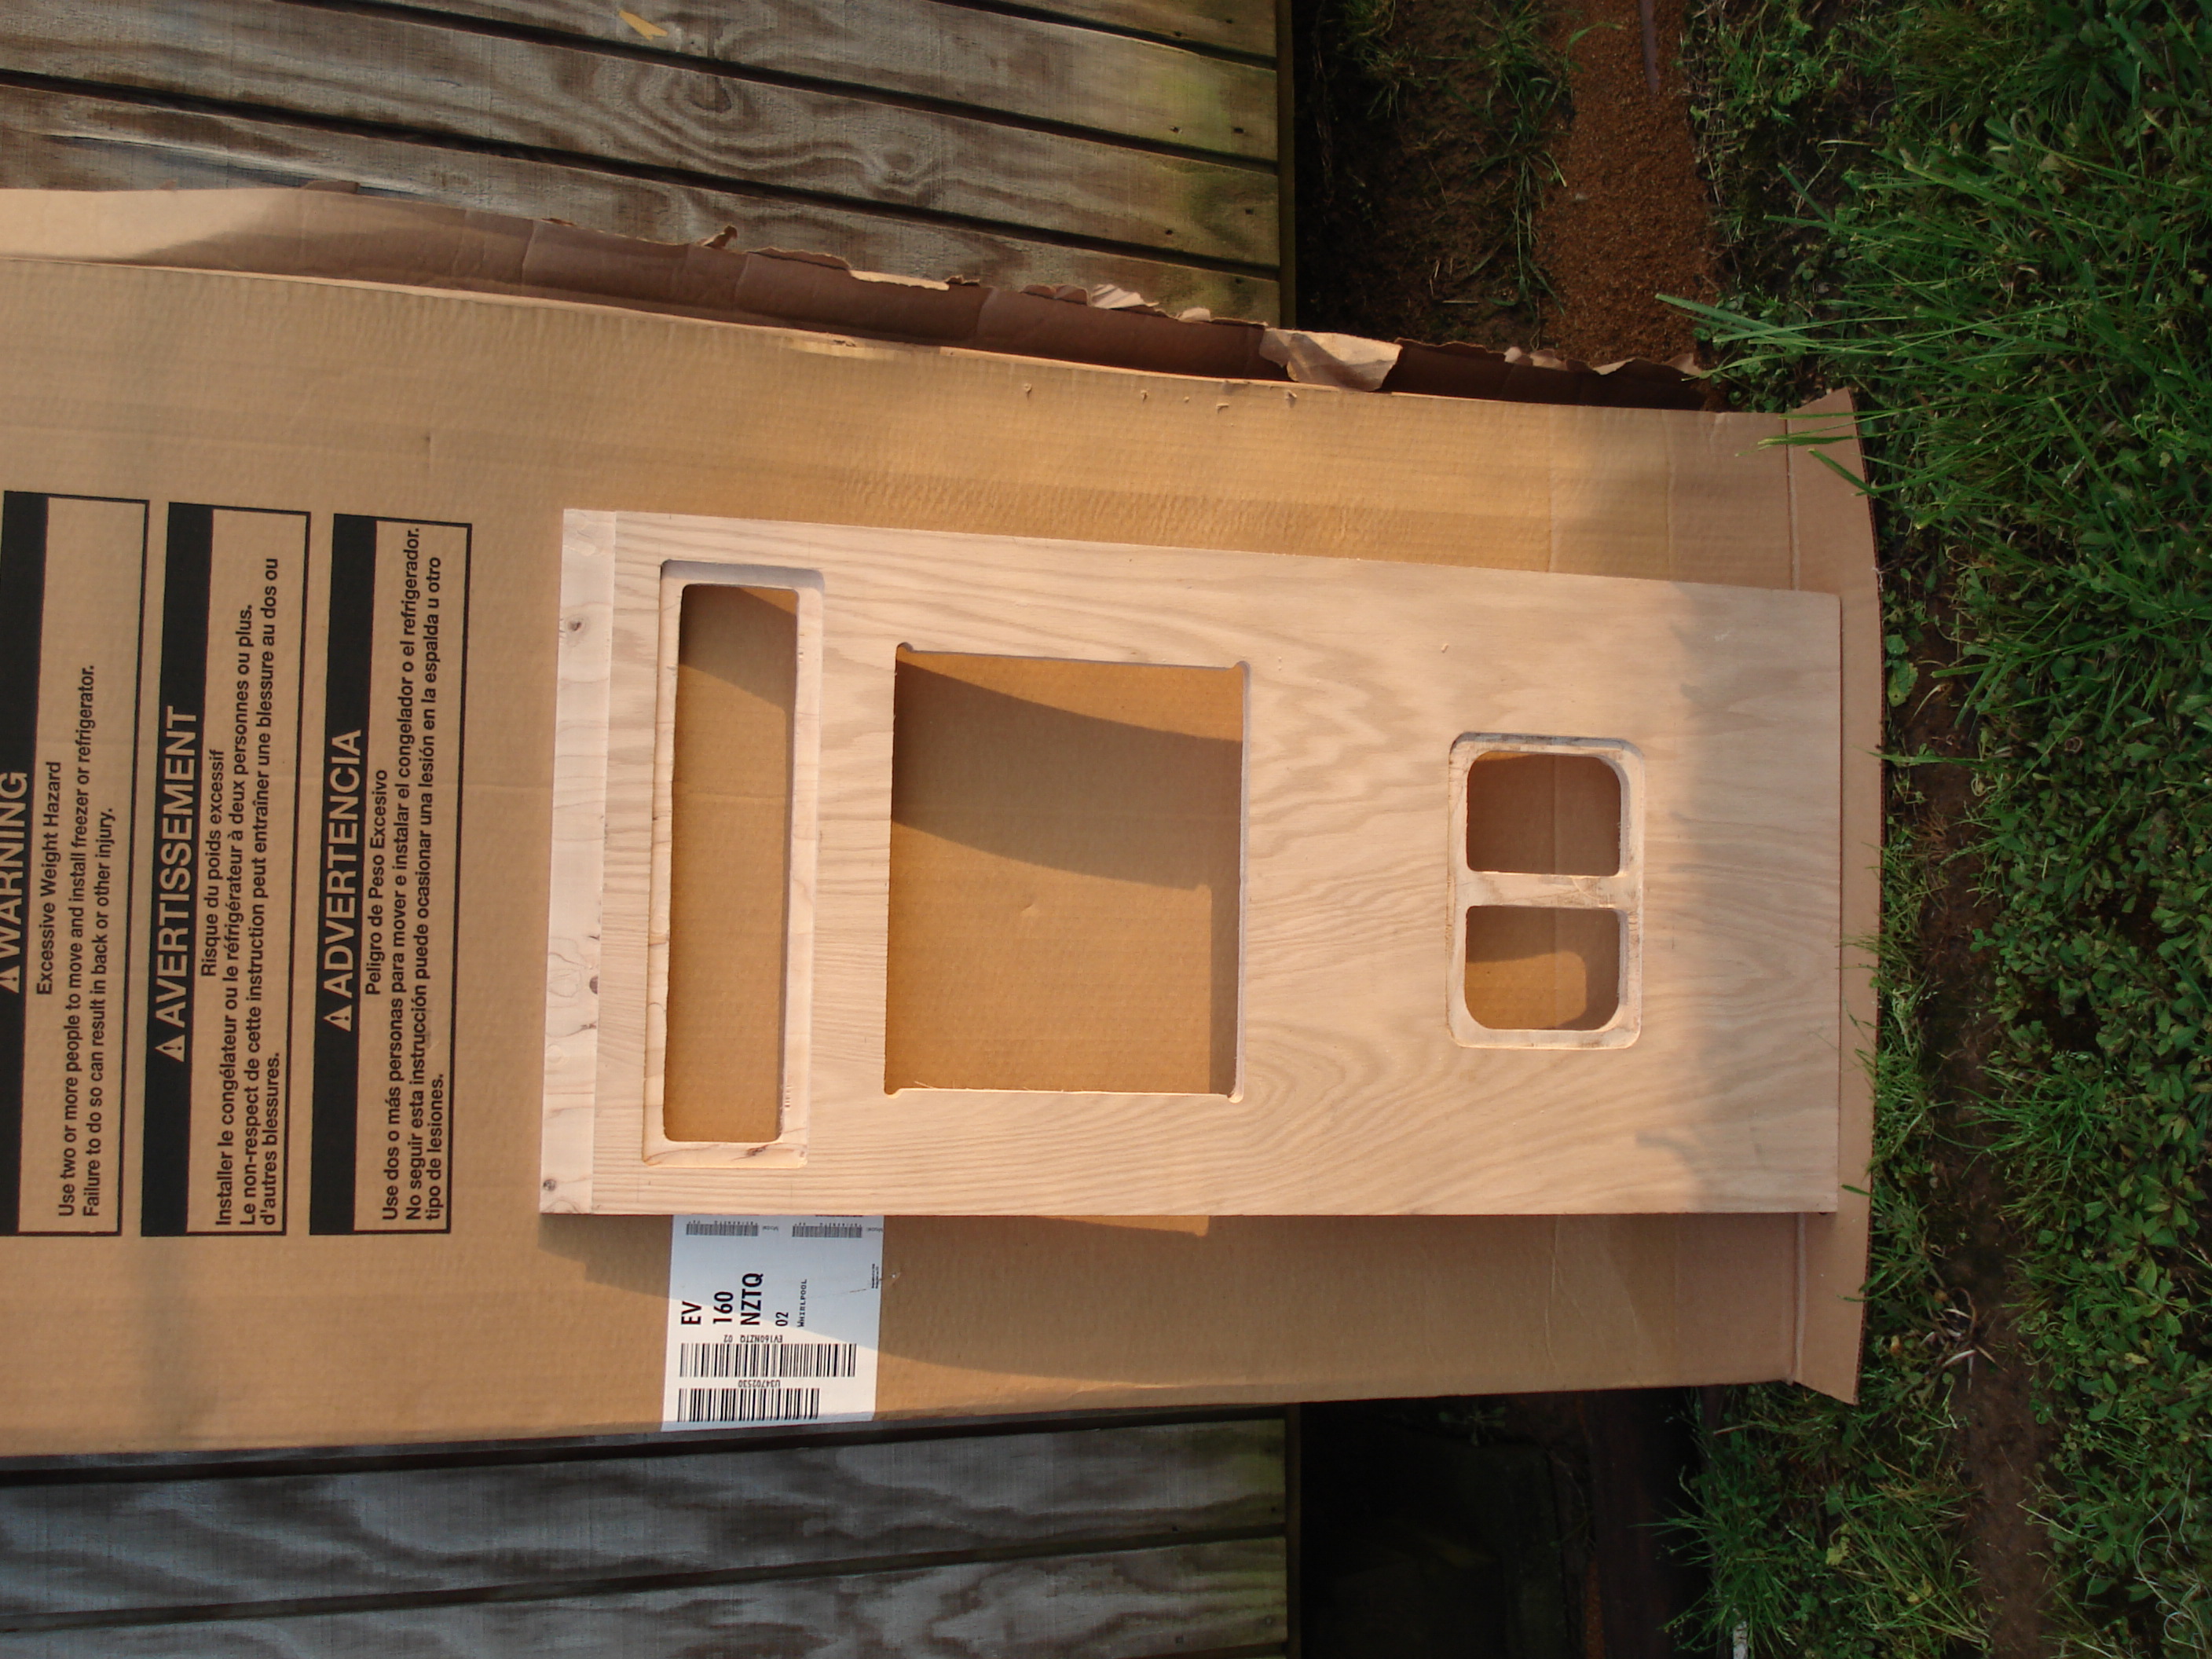
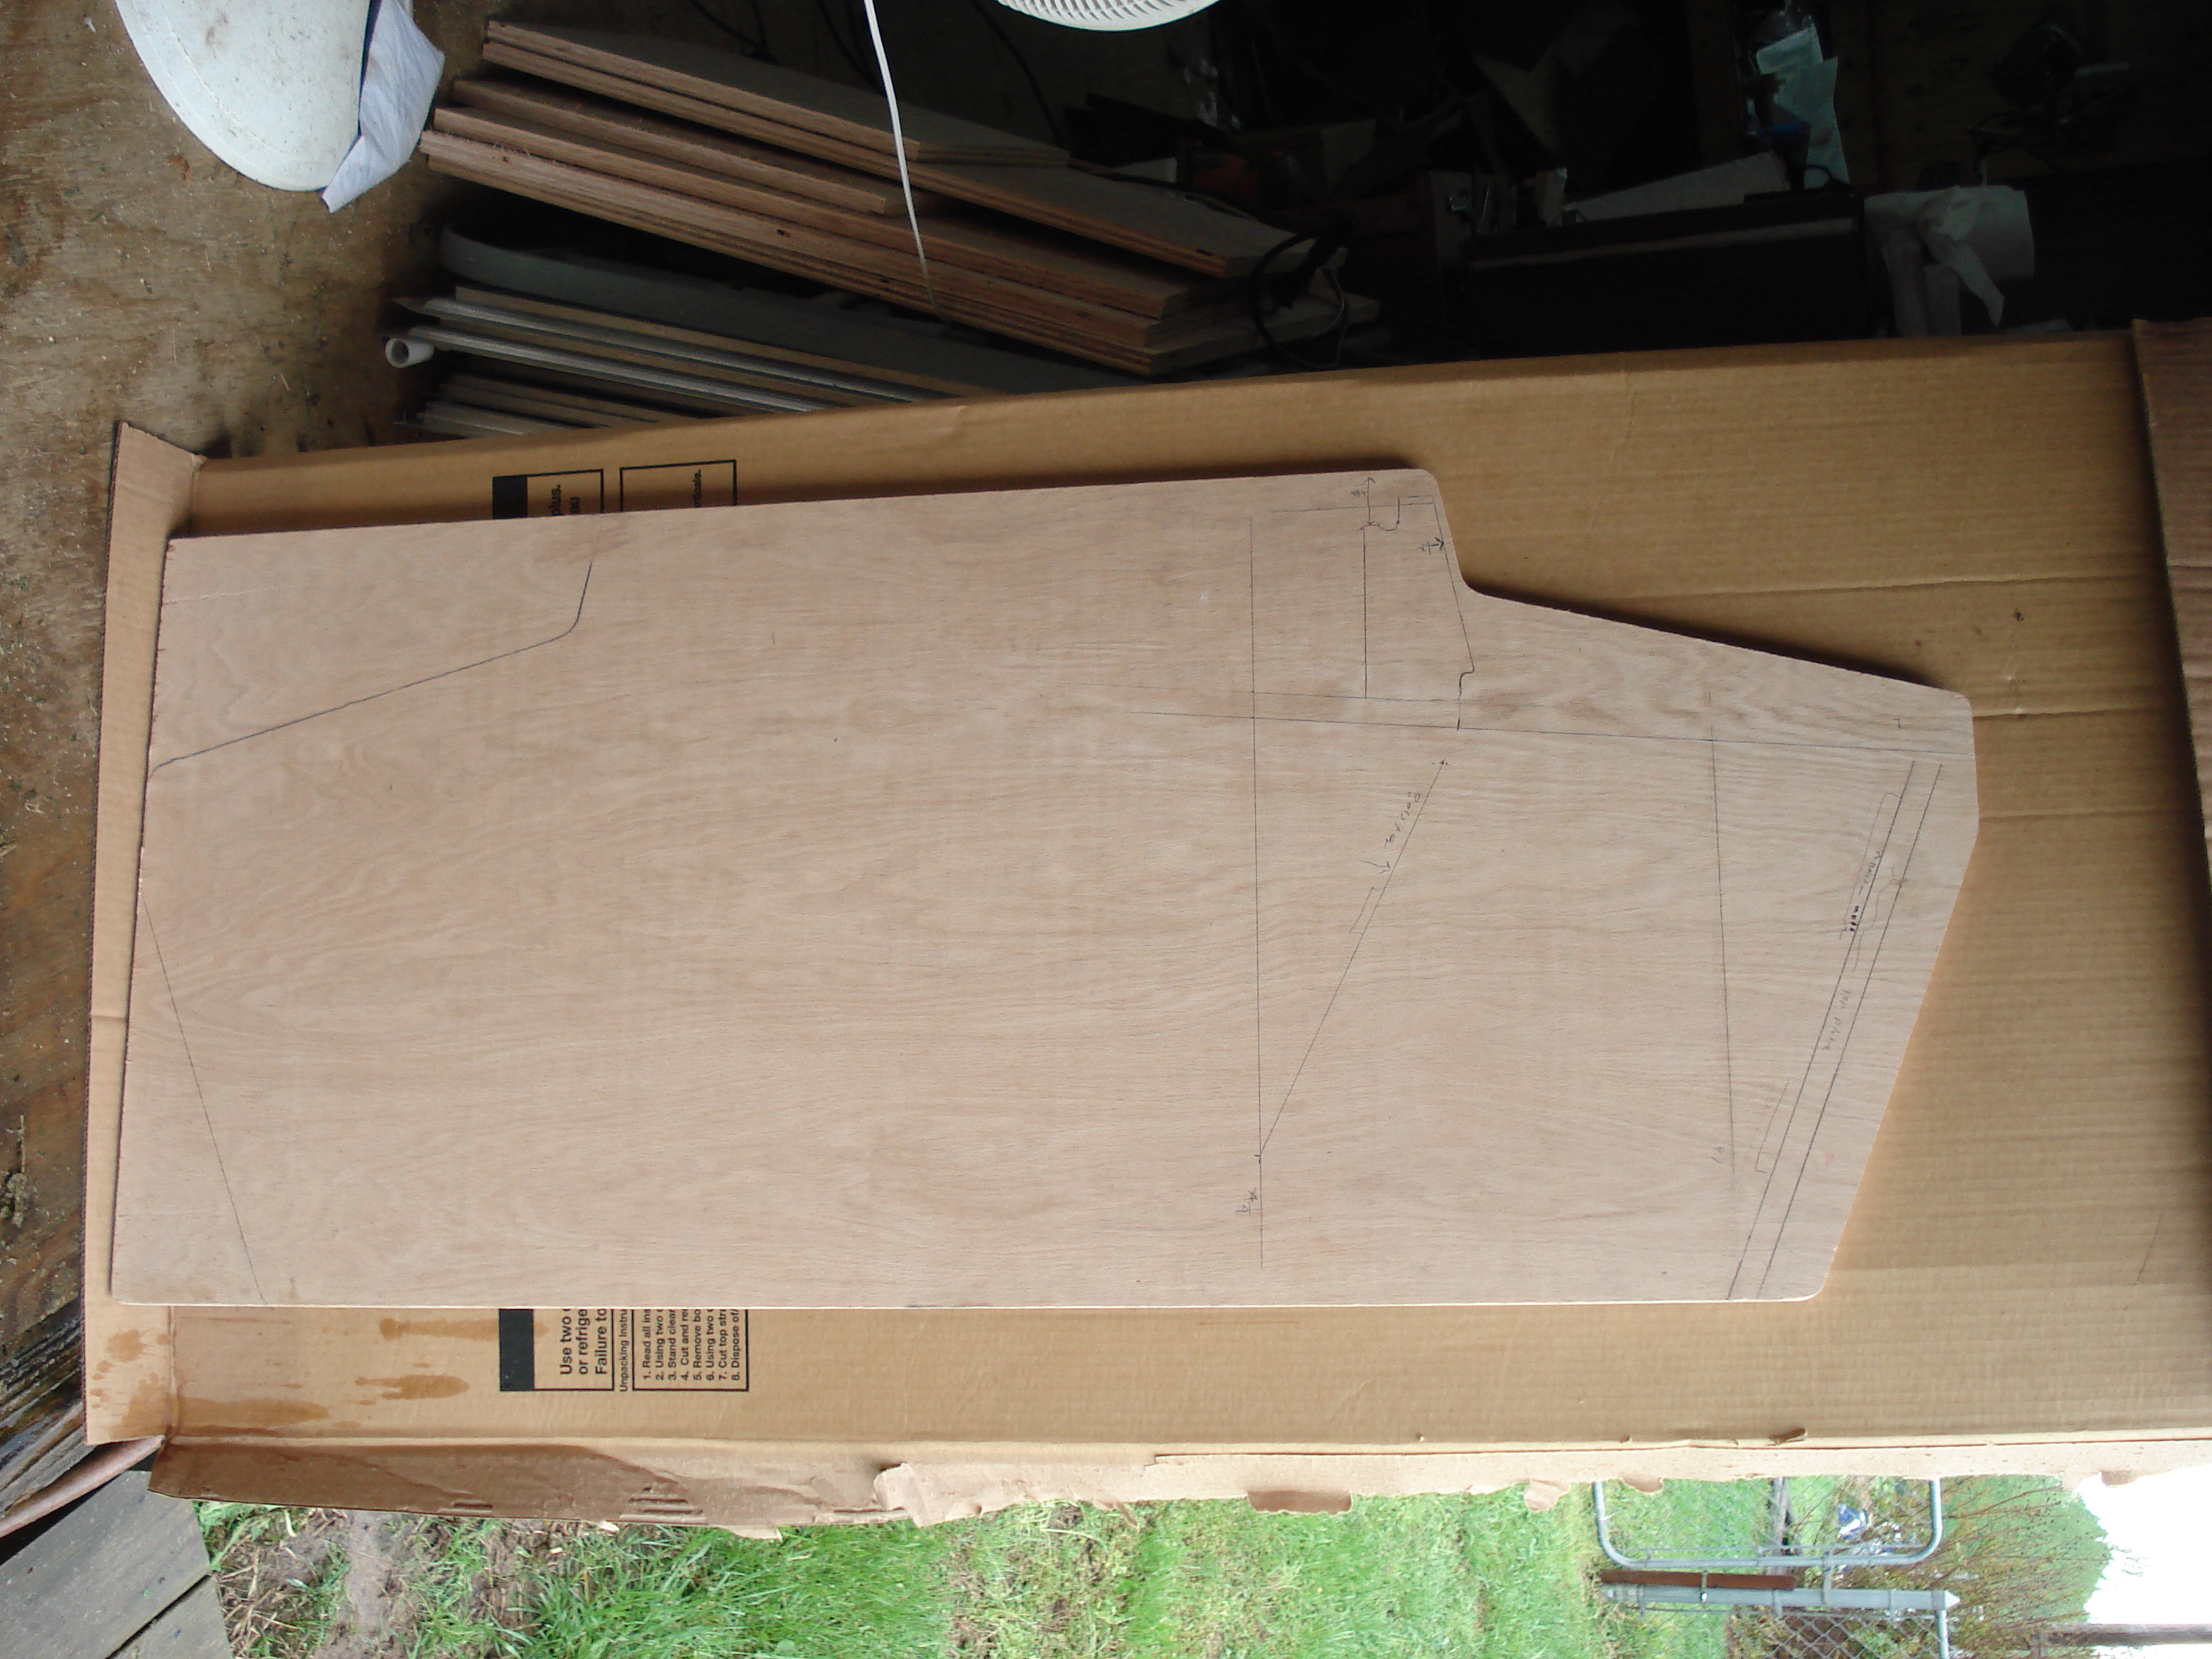
Made measurements and planned a cutout from oak ply.(click on image for full size)

I started by making rough cuts and getting the sides, back, front and parts. The bottom was cut to size from a quarter sheet of c-d ply.
The other pieces I needed were cut from a seperate half sheet of oak ply.
I used a router and sander to put the finishing cuts and angles on the parts.
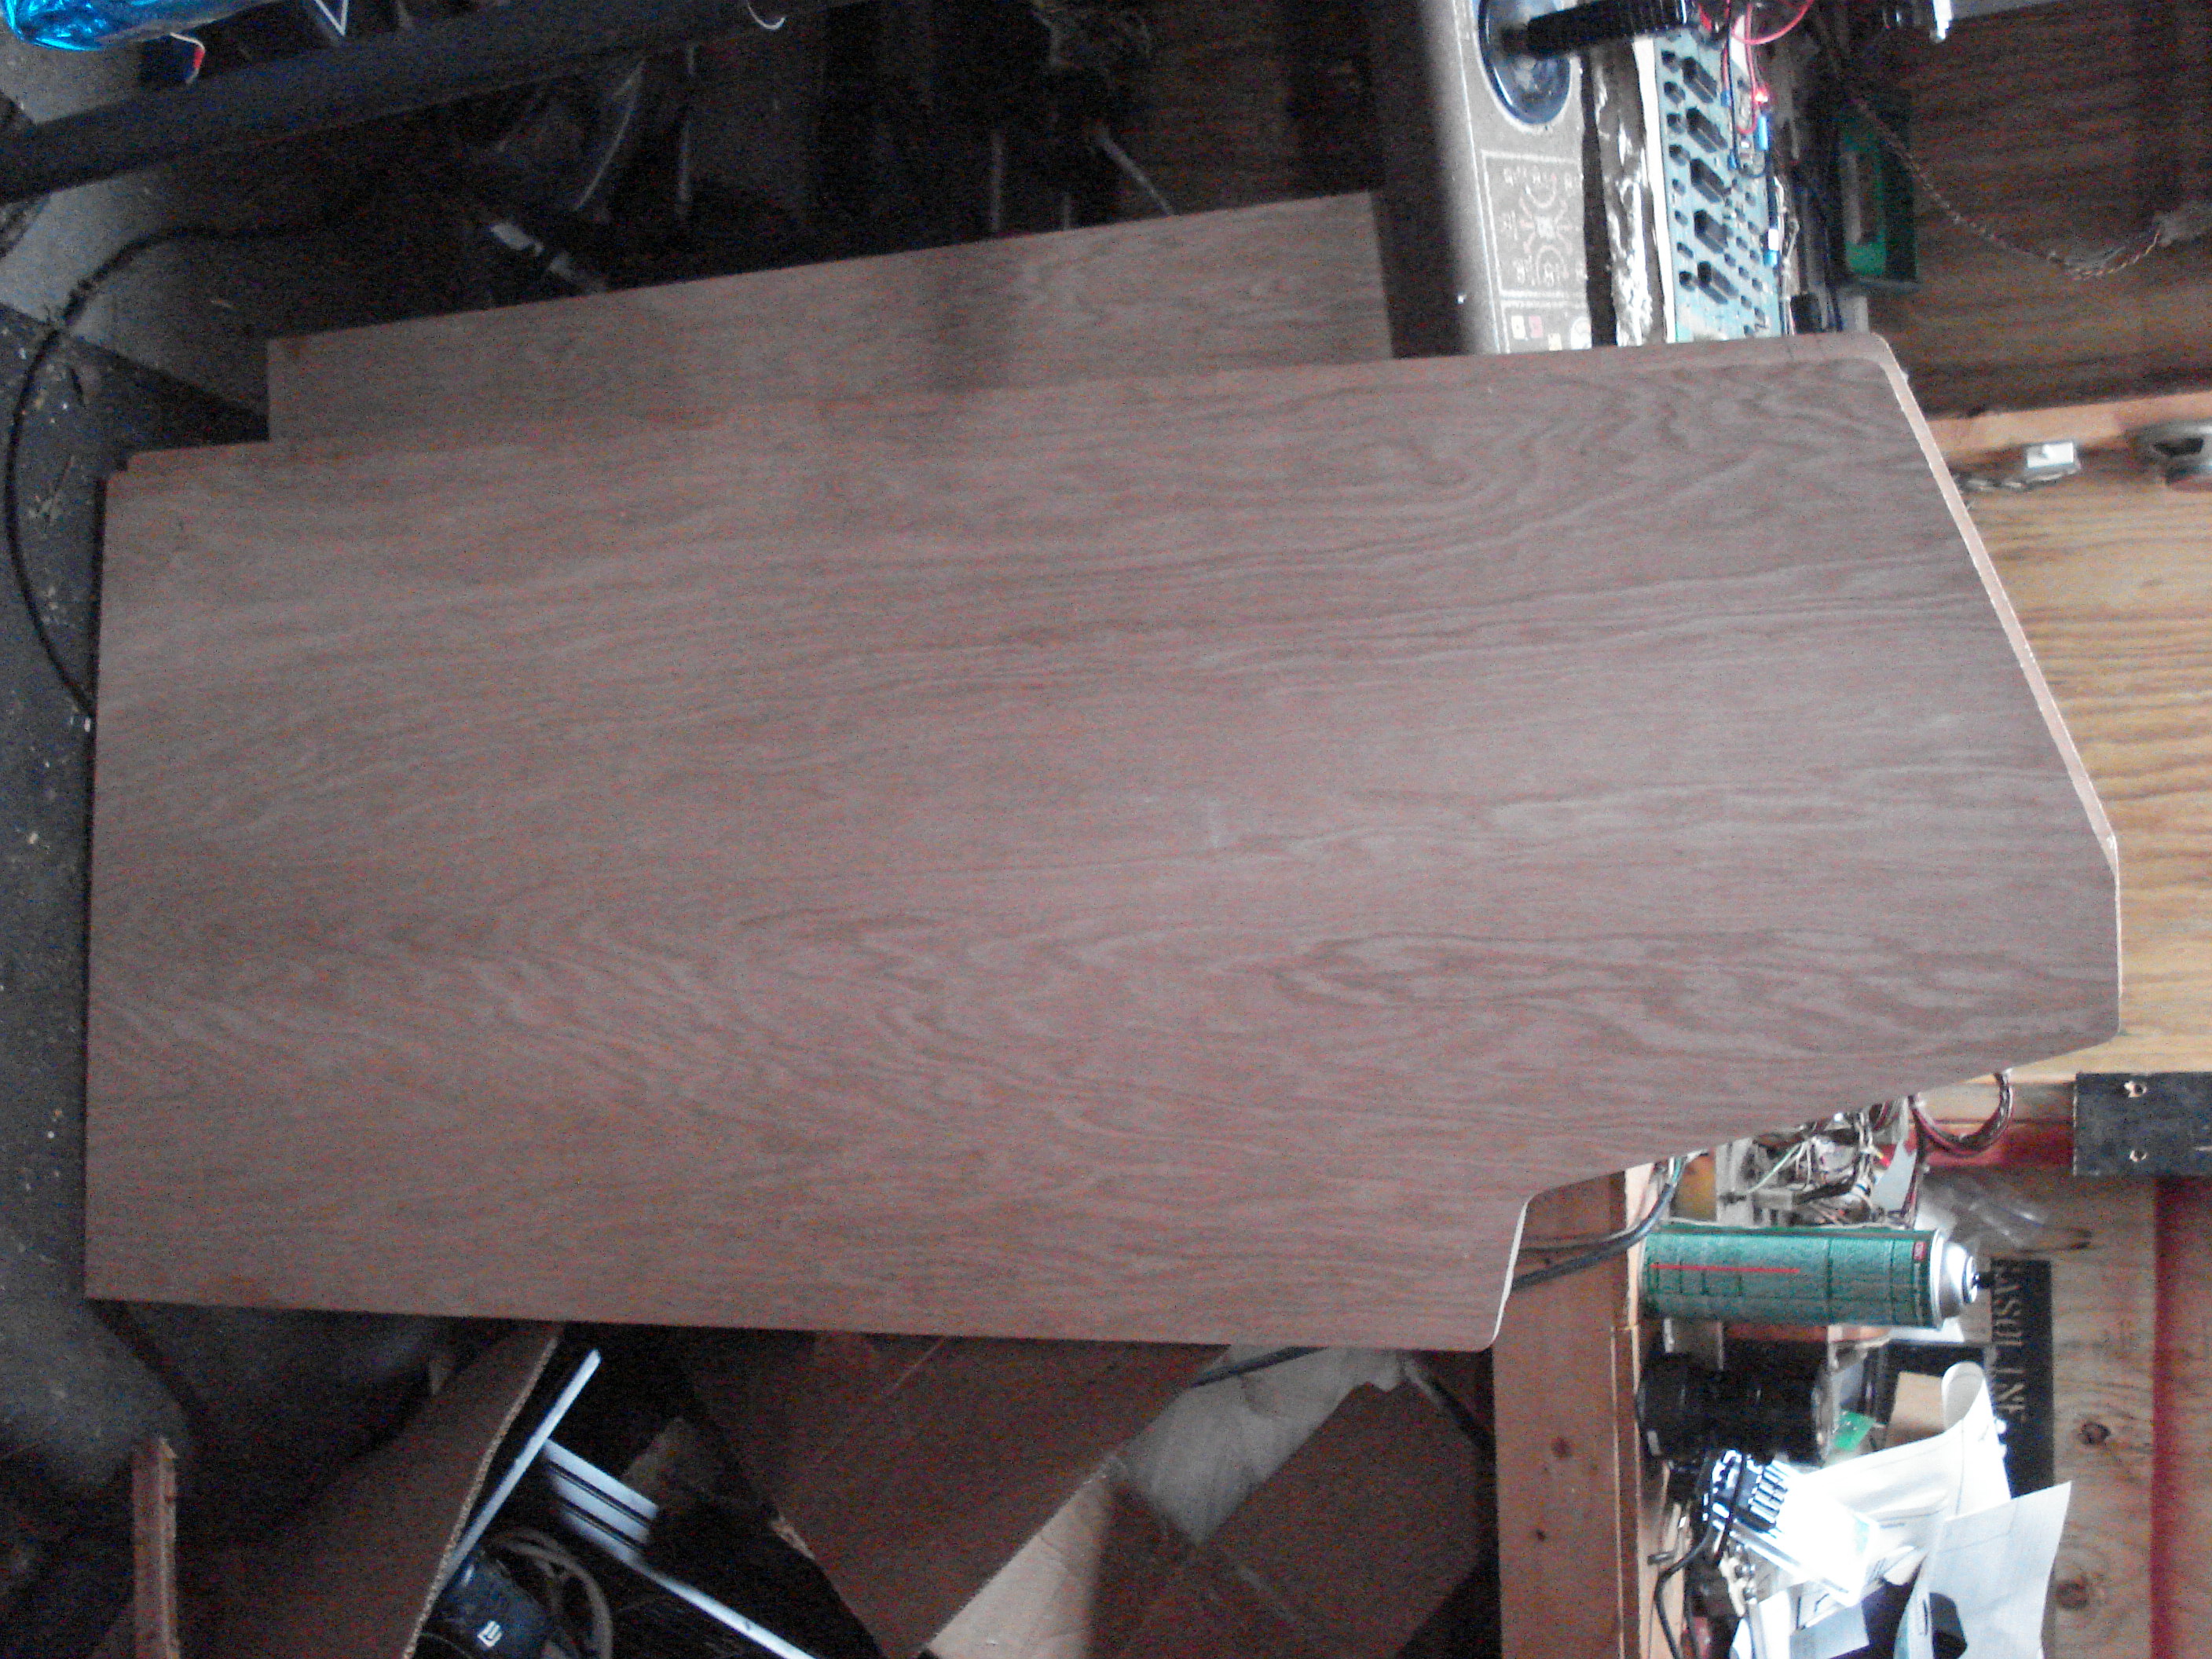
To cover the edges of the sides, I got some oak iron-on edgebanding.


It just irons on with the iron as hot as it goes. To get it to go around the tight radius without splitting, I wet a paper towel
and steamed the banding. Then I ironed it till it was thoroughly dry and stuck to the edge of the ply.
Assembly was done using pocket screws and carpenters glue. There are only a couple things that are really critical for the cabinet:
The angle and position of the monitor table,
The angle and position of the front bezel,
The position of the control panel in relation to the bezel and front glass,
The top.
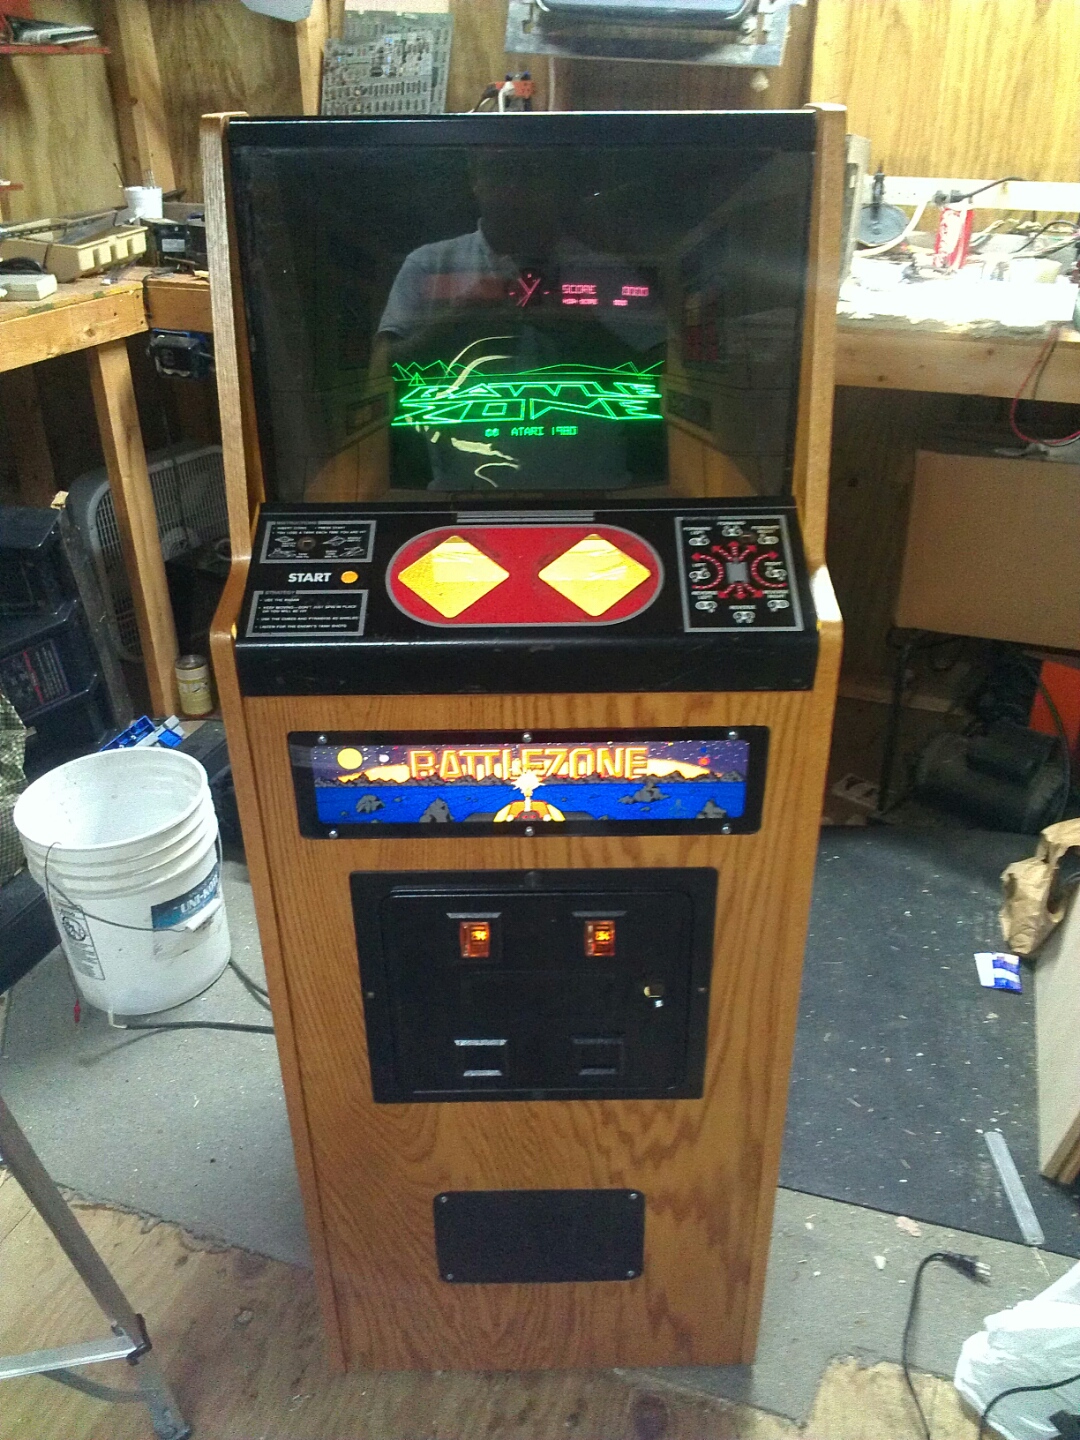
Start by installing the control panel.
Then install the front glass and retainer rails,
Then install the bezel and place the monitor table to fit.
Then install the top and fit it to the front glass and the back serial number plate.
Here is a pic of the cabinet assembled and stained, ready to get a coat of polyurathane finish.
Nearing completion. Only need to rework the controls now.
Send me an Email